Practical Exercise 5: PINHOLE CAMERA
A simple pinhole camera can be constructed in the class to observe the surroundings - it is possible to get a picture of a lit light bulb, as well as of a street lit by bright sunlight. To observe a partial eclipse, it is necessary that the shade of the pinhole camera is at least a metre from the hole - in this case it has a diameter of about a centimetre. To observe really large sunspots, a pinhole camera with a length of at least two or three metres would be needed, which can be made e.g. from a carpet tube, which, however, must be fixed for a suitable assembly. Aiming at the Sun is then achieved in a way that the shadow cast by the tube is as small as possible.
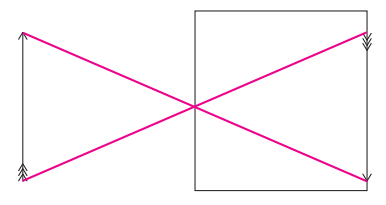
The principle of a pinhole camera is very simple: a part of light rays (which emerge from the displayed object) passes through the hole and after their incidence on the shade they create an inverted image.

Figure 10: The principle of a pinhole camera
Note: For further experiments, where it is possible to make the hole accurately (e. g. in a thin aluminium sheet, which can be further thinned out with sandpaper and then pierced on a wooden base with a sharp needle, which can be then used with a micrometre to measure the diameter), we can use the formula
derived by Lord Rayleigh, where f is the distance from the hole to the shade and is the wavelength of light. For calculation in millimetres we can use the wavelength of yellow-green light, which is 0.000 55 mm.
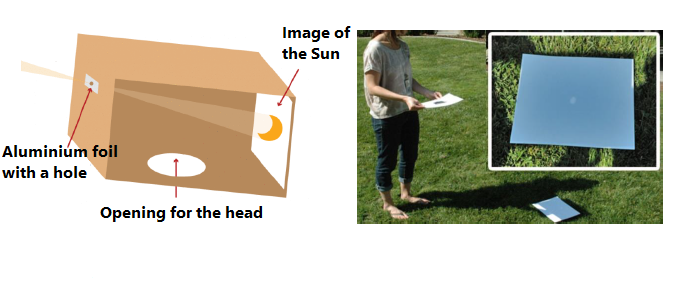
For observing the Sun, a popular design is created using a crate, where the rays from the Sun pass through a hole in the back and fall on the shade in the front part (see Figure). However, it is better to start the experiments with a shade made of hard paper and a shade made of a sheet of paper placed in the shadow.
Due to great variability, the worksheet only contains a proposal for an activity, which needs to be adjusted for the needs of a specific implementation.

Figure 11: Realization of a pinhole camera


