

Practical Exercise 2: DRAW THE CONIC SECTIONS USING PINS AND THREAD.
Aim:
To illustrate how the conic sections are produced. This activity can be done individually for the drawing of the circle and ellipse, but for the parabola work in pairs is recommended.
Necessary materials:
- thick cardboard, cork board, or other surface that you can put a push pin into,
- graph paper (A4),
- push pins,
- of thread or string (one of about 40 cm and another of about 2 m),
- pens or pencils in 4 colours,
- ruler and triangle.
Instructions for the teacher:
Using the listed materials, the students can draw different conic sections. Varying the thread length and/or the distance between the pins, sections with different parameters can be drawn and compared.
Instructions for the students:
How to draw a circle:
1. Secure the graph paper ontop of the cork board.

2. Stick one pin in the centre of the paper sheet.
3 From the thread (40 cm), make a loop.

4. Place a loop of string around the push pin and the pencil (see figure).
5 Pull the loop tight and draw a circle around the push pin as shown in the figure.
6 Make one full revolution around the pin. You have drawn a circle.
7 You can vary the length of the string to see how that changes the circle.


How to draw an ellipse:
1. On the graph paper, measure 5 cm from each side of the centre (parallel to the long side) and mark the point.
2. Stick a pin in each of these points.
3. Loop the string around both pins and the pencil as shown in the figure.
4. Keeping the thread tight and move the pencil first to the left, then to the right until it reaches the level of the pins we can draw half of the ellipse.
5. Similarly, we can draw the other half as shown in the figure.
6. Enlarge the distance between the pins and the centre by another 2 cm. Repeat the above steps using a pencil with a different colour.
7. Put the pins in their initial positions. Reduce the length of the thread by about 1 cm. Draw an ellipse using a third colour.
How to draw a parabola:
1. Stick the pin in the centre of the graph sheet.
2. make a loop of the 2m long thread. Loop one end around the pin. Have one of your classmates hold the other end so that the thread is tightly stretched ()but not too tightly.
3. Place the pencil/pen inside the thread loop, close to the end of the sheet as shown on the picture and move it towards the pin and then away from it on the other side.
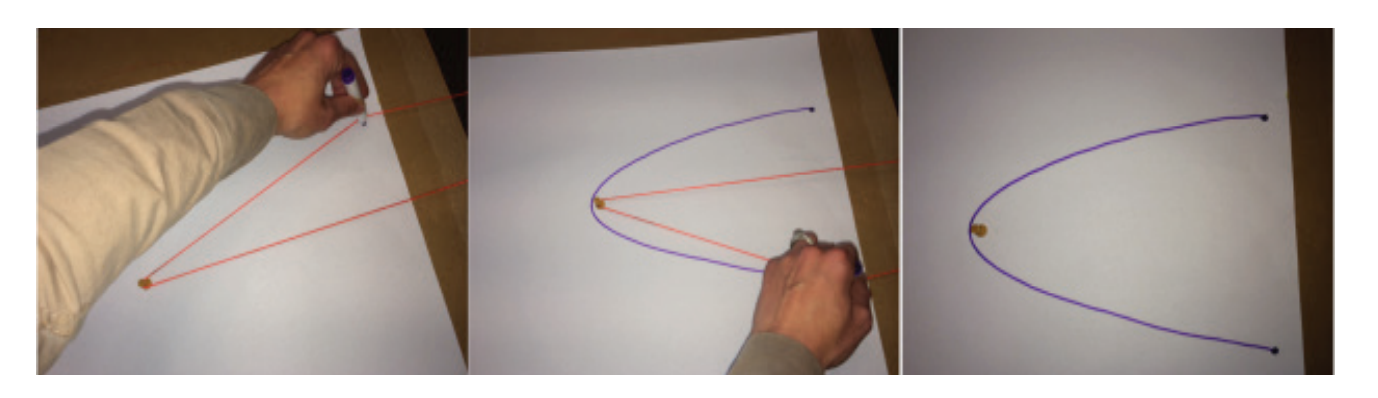
(zdroj: https://hollymath.com/2014/05/14/drawing-conic-sections-with-push-pin-and-string/)
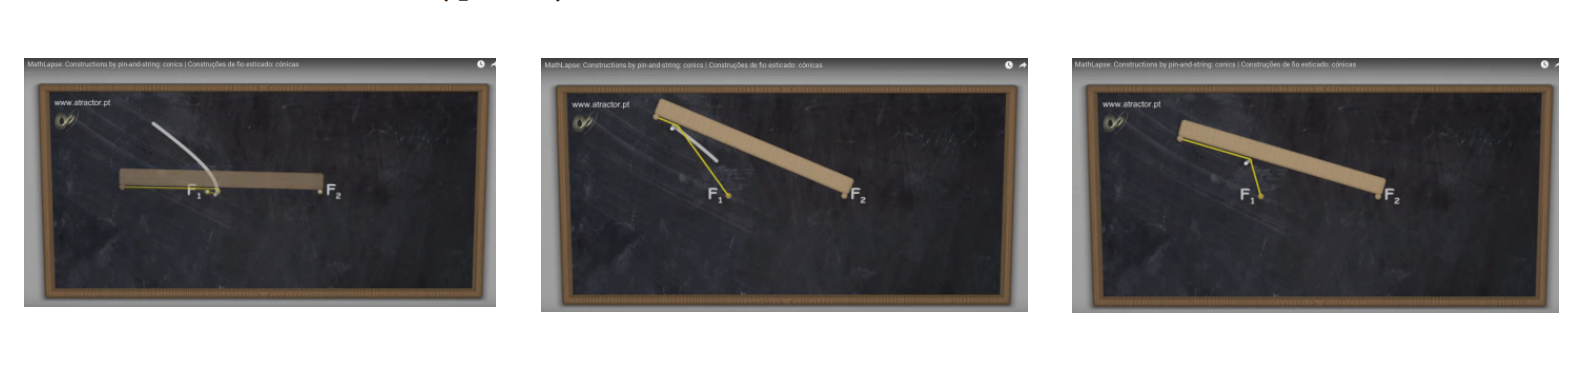
How to draw a hyperbola:
1.On the graph paper, measure 5 cm from each side of the centre (parallel to the long side) and mark the points with F1 and F2.
2.Using tape, stick one side of the thread loop to one end of a ruler.
3.Stick some tape to the other side of the ruler, so that some of it sticks out.
4.Pin the sticking out part of the tape to the F2 point as shown on the picture.
5.Loop the free end of the thread around the F1 pin.
6.Place the pencil in the inside of the thread and move it along the ruler towards F1. The thread has to stay tight all the time. Once you reach F1, you have drawn half of the hyperbola.
7. Turn the ruler on the other side of F2, as shown. Repeat the drawing.

8. In the same manner, if you attach the ruler to F1 and draw around F2, you can get the other part of the hyperbola.
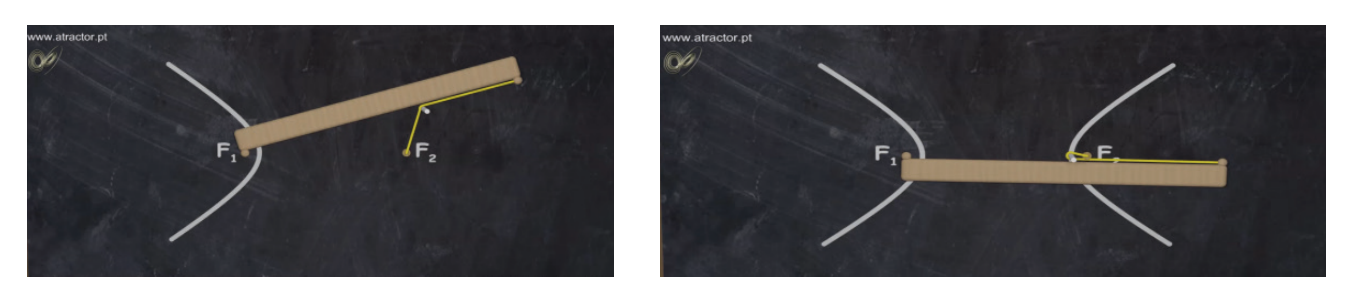
(Picture credit: https://www.youtube.com/watch?v=mldZ_7QwLvs)
Summary questions:
Q: What is the name of the points in which you placed the pins when drawing the ellipse?
A: Foci (fucus).
Q: What is the name of the initial point, on each side of which you placed the pins?
A: Centre of the ellipse.
Q: What is the name of the straight line that passes through the centre and the two foci?